
In a previous post I talked a bit about how I was a contributor to the mlb-led-scoreboard project and how it landed me a job working for MLB for the 2021 season.
As you may recall, that project is to display MLB scores on an LED matrix panel that’s driven by a Raspberry Pi.
The Problem
Embedded development is tough. And yeah, putting some code on a Raspberry Pi isn’t really an embedded system (since it runs a Linux distribution called Pi OS), but it shares some of the same characteristics that make development challenging. Consider:
- There’s a whole bunch of different Raspberry Pi models and configurations
- 4 different base models (Pi 3 and Pi 4 are common), 1 Zero model (with and without WiFi), 1 Pico 2040 (which is a microcontroller)
- A/B configurations
- RAM differences
- The project requires an adapter board, which can be one of two types
- Bonnet (solderless… sometimes, unless you have a 64px tall panel…)
- HAT (requires soldering)
- LED matrices aren’t uniform
- HUB75 standard is most common
- Multiple sizes (32x32, 64x32, 64x64, 128x32, 128x64, more?)
- Everything listed above is sourced and assembled by the end user
(Side note: the cost of a new LED matrix setup including all the above is usually estimated at around $150)
This means lots of things can go wrong, both from an assembly standpoint (oops, I didn’t solder the HAT correctly!) and from a code perspective (i.e. the layout breaks on specific board sizes). Unfortunately, beyond a robust README, there’s not a lot that can be done about the first issue.
The second, however, poses a problem to the developer. I, for instance, run a 64x64 panel on a Raspberry Pi 3B+. When a bug report comes in saying that something is broken on a panel size that I don’t own, am I reasonably expected to shell out $50 to $75 (including shipping) for a new panel for an issue that doesn’t affect me personally? After all, without it, I’m basically completely unable to respond to the issue in a constructive way.
RGBMatrixEmulator
I decided this would be a good candidate for emulation. Essentially, my goal was to reverse engineer the rpi-rgb-led-matrix library (the code that drives all the LEDs) and write a replacement that could be dropped-in with minimal code change. This means I’m no longer bound by the hardware – panel size is configurable and it can run on different platforms (Windows, Mac, Linux, etc.).
The Guts of rpi-rgb-led-matrix
The driver library was written in C++, but offers Python bindings, which is what a lot (all?) of the sports scoreboards use to drive their panels. For my emulator, I simply needed a Python package that had the same classes and functionality as the Python bindings in the original library and can draw pixels to the screen. Specifically, I’d need:
RGBMatrixclass (responsible for managing the canvas, refreshing the panel on V-sync)Canvasclass (the container for the pixel data)graphicsandfontmodules (general drawing and font handling)RGBMatrixOptionsfor obvious reasons- Some helper/utility modules for the emulator itself
Putting it Together
Step 1 is finding a library that can output graphics. I chose pygame. It’s been around 20(!) years and works with all the platforms I want to support, and the API seems simple enough to learn.
Next, I created skeletons of all the classes I knew I would need. I’ll only show the Canvas class, since the other classes simply write into its pixel buffer and then it can draw to the pygame window whenever the Matrix class calls SwapOnVsync.
(All these function names are the same as what’s present in rpi-rgb-led-matrix, so as long as the implementation matches, it’ll just work!)
class Canvas:
  def __init__(self, options):
    self.options = options

    self.width = options.cols
    self.height = options.rows
    self.brightness = options.brightness

    self.__pixels = [[Color.BLACK() for x in range(0, self.options.cols)] for y in range(0, self.options.rows)]
    self.__surface = None

    self.__load_emulator_window()
This class simply takes an instance of RGBMatrixOptions which parses the command line arguments supported by the existing library and sets the canvas options as needed.
You’ll note the __pixels attribute – this is just a 2D array of colors. They default to BLACK, which for our purposes is OFF. Colors hold an RGB value and can either be a Color object or a tuple (I’ve seen some scripts use these interchangeably so I had to support that use case). Each value can be between 0 - 255.
Next, there’s a method for drawing to the screen, which simply creates a Rect in pygame of the correct size and location:
  def __pygame_pixel(self, col, row):
    return pygame.Rect(
      col * self.options.pixel_size,
      row * self.options.pixel_size,
      self.options.pixel_size,
      self.options.pixel_size
    )

  def __draw_pixel(self, pixel, x, y):
    self.__adjust_pixel_brightness(pixel)
    pixel_rect = self.__pygame_pixel(x, y)
    if self.options.pixel_style == 'circle':
      radius = int(pixel_rect.width / 2)
      center_x = pixel_rect.x + radius
      center_y = pixel_rect.y + radius
      pygame.draw.circle(self.__surface, pixel.to_tuple(), (center_x, center_y), radius)
    else:
      pygame.draw.rect(self.__surface, pixel.to_tuple(), pixel_rect)
Notice the options.pixel_style… This way you can represent the LEDs as square pixels or circles!
Next, some functions to write into the pixel buffer at the correct location:
  def Clear(self):
    self.__pixels = [[Color.BLACK() for x in range(0, self.options.cols)] for y in range(0, self.options.rows)]

  def Fill(self, r, g, b):
    self.__pixels = [[Color(r, g, b) for x in range(0, self.options.cols)] for y in range(0, self.options.rows)]

  def SetPixel(self, x, y, r, g, b):
    if self.__pixel_out_of_bounds(x, y):
      return

    try:
      pixel = self.__pixels[int(y)][int(x)]
      pixel.r = r
      pixel.g = g
      pixel.b = b
    except Exception:
      pass
And finally, a method to update the screen with the canvas’s pixel buffer:
  def draw_to_screen(self):
    for row, pixels in enumerate(self.__pixels):
      for col, pixel in enumerate(pixels):
        self.__draw_pixel(pixel, col, row)

    pygame.display.flip()
That’s All, Folks!
For drawing to the emulated panel, that’s all that you really need to do!
There are some helper functions to draw text, lines, circles in the graphics module, and I totally glossed over parsing BDF fonts to an array of pixels as well as using PIL to load images into the pixel buffer. Essentially, this boils down to the exact same thing – convert text, images, etc. into an array of color data and merge it into the canvas pixel buffer.
To integrate the emulator into an existing script, simply replace the import from the original library with the emulator library:
# Output to RPI LED Matrix
from rgbmatrix import RGBMatrix, RGBMatrixOptions

# Output to Emulated Matrix
from RGBMatrixEmulator import RGBMatrix, RGBMatrixOptions
There’s also an addition to the RGBMatrixOptions class that allows overriding the default pixel size and shape from a configuration file. You can see what it does in the README.
Other than that, changing the size of the board is as simple as passing a custom --led-cols or --led-rows flag when starting a script!
Testing
This begs the question… One of the main points of emulation is that it behaves exactly like the emulated system. While I can’t say that the emulation is perfect, there have been some considerable successes:
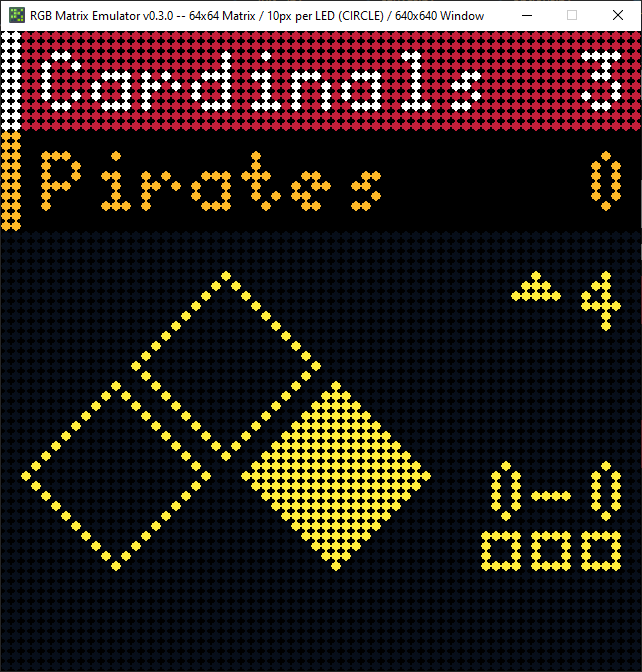
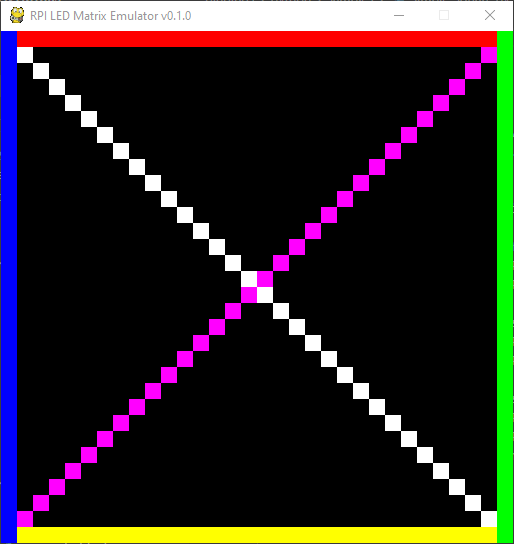
rpi-rgb-led-matrixprovides a set of samples that are easily comparable to actual hardware- It is 100% compatible with
mlb-led-scoreboard - It’s reproduced bugs that are present on actual hardware
Possibly the most entertaining – I got a bug report for the emulation code saying text doesn’t show up on the NHL LED Scoreboard when running on MacOS… Upon further inspection it actually turned out to be an issue with the PIL dependency. Not only was the bug not in my code, but it reproduced the issue from the real hardware on the emulator!
Screenshots
Get RGBMatrixEmulator
RGBMatrixEmulator is available on pypi, or you can check out the source code here.
Thanks for reading!
- ← Previous: Devise Flash Messages in JSON Responses
- Next: Writing a Gameboy Game in 2021: Part 5 -- Screen Transitions →